Tuesday, 28 February 2017

Popup Menu With Icon In Android

activity_main.xml

<?xml version="1.0" encoding="utf-8"?>
<LinearLayout xmlns:android="http://schemas.android.com/apk/res/android"
    xmlns:tools="http://schemas.android.com/tools"
    android:layout_width="match_parent"
    android:layout_height="match_parent"
    android:gravity="center"
    android:orientation="vertical"
    tools:context="com.androidsimplifycodes.example.MainActivity">

    <Button
        android:id="@+id/btnPopUpMenu"
        android:layout_width="wrap_content"
        android:layout_height="wrap_content"
        android:text="Popup Menu"
        android:textColor="@android:color/black"
        android:textStyle="bold" />

</LinearLayout>
For the icons right click on drawable folder and select New->Vector Asset then after added required icons.
pop_up_menu.xml

<?xml version="1.0" encoding="utf-8"?>
<menu xmlns:android="http://schemas.android.com/apk/res/android">
    <item
        android:id="@+id/action_phone"
        android:icon="@drawable/ic_call"
        android:title="Phone" />
    <item
        android:id="@+id/action_mail"
        android:icon="@drawable/ic_post"
        android:title="Mail" />
    <item
        android:id="@+id/action_add_to_calender"
        android:icon="@drawable/ic_calendar"
        android:title="Calender" />
</menu>
MainActivity.java

package com.androidsimplifycodes.example;

import android.content.Context;
import android.os.Bundle;
import android.support.v7.app.AppCompatActivity;
import android.support.v7.view.menu.MenuBuilder;
import android.support.v7.view.menu.MenuPopupHelper;
import android.support.v7.widget.PopupMenu;
import android.view.MenuItem;
import android.view.View;
import android.widget.Button;
import android.widget.Toast;

public class MainActivity extends AppCompatActivity {

    protected Context context;
    protected Button btnPopUpMenu;

    @Override
    protected void onCreate(Bundle savedInstanceState) {
        super.onCreate(savedInstanceState);
        super.setContentView(R.layout.activity_main);

        context = MainActivity.this;
        initView();

        btnPopUpMenu.setOnClickListener(new View.OnClickListener() {
            @Override
            public void onClick(View view) {

                PopupMenu popupMenu = new PopupMenu(context, view);
                popupMenu.getMenuInflater().inflate(R.menu.pop_up_menu, popupMenu.getMenu());

                popupMenu.setOnMenuItemClickListener(new PopupMenu.OnMenuItemClickListener() {
                    public boolean onMenuItemClick(MenuItem item) {
                        switch (item.getItemId()) {
                            case R.id.action_mail:
                                Toast.makeText(context, item.getTitle(), Toast.LENGTH_SHORT).show();
                                break;
                            case R.id.action_phone:
                                Toast.makeText(context, item.getTitle(), Toast.LENGTH_SHORT).show();
                                break;
                            case R.id.action_add_to_calender:
                                Toast.makeText(context, item.getTitle(), Toast.LENGTH_SHORT).show();
                                break;
                        }
                        return true;
                    }
                });

                MenuPopupHelper menuHelper = new MenuPopupHelper(context, (MenuBuilder) popupMenu.getMenu(), view);
                menuHelper.setForceShowIcon(true);
                menuHelper.show();
            }
        });
    }

    private void initView() {
        btnPopUpMenu = (Button) findViewById(R.id.btnPopUpMenu);
    }
}
Output :

Select Image From Gallery Android

activity_main.xml

<?xml version="1.0" encoding="utf-8"?>
<LinearLayout xmlns:android="http://schemas.android.com/apk/res/android"
    xmlns:tools="http://schemas.android.com/tools"
    android:layout_width="match_parent"
    android:layout_height="match_parent"
    android:layout_weight="1"
    android:orientation="vertical"
    tools:context="com.androidsimplifycodes.example.MainActivity">

    <LinearLayout
        android:layout_width="match_parent"
        android:layout_height="0dp"
        android:layout_weight="0.2"
        android:gravity="center">

        <Button
            android:id="@+id/btnGallery"
            android:layout_width="wrap_content"
            android:layout_height="wrap_content"
            android:text="Gallery"
            android:textColor="@android:color/black"
            android:textStyle="bold" />

    </LinearLayout>

    <RelativeLayout
        android:layout_width="match_parent"
        android:layout_height="0dp"
        android:layout_weight="0.8"
        android:gravity="center"
        android:padding="15dp">

        <ImageView
            android:id="@+id/ivImage"
            android:layout_width="match_parent"
            android:layout_height="match_parent"
            android:contentDescription="@null"
            android:scaleType="fitXY"/>

        <View
            android:layout_width="match_parent"
            android:layout_height="match_parent"
            android:background="@drawable/boarder" />

    </RelativeLayout>

</LinearLayout>
boarder.xml

<?xml version="1.0" encoding="UTF-8"?>
<shape xmlns:android="http://schemas.android.com/apk/res/android">
    <solid android:color="@android:color/transparent" />
    <stroke
        android:width="1.5dip"
        android:color="#000000" />
    <padding
        android:bottom="1dp"
        android:left="1dp"
        android:right="1dp"
        android:top="1dp" />
</shape>
MainActivity.java

package com.androidsimplifycodes.example;

import android.app.Activity;
import android.content.Intent;
import android.database.Cursor;
import android.graphics.Bitmap;
import android.graphics.BitmapFactory;
import android.net.Uri;
import android.os.Bundle;
import android.provider.MediaStore;
import android.support.v7.app.AppCompatActivity;
import android.view.View;
import android.widget.Button;
import android.widget.ImageView;

public class MainActivity extends AppCompatActivity {

    protected Button btnGallery;
    protected ImageView ivImage;

    @Override
    protected void onCreate(Bundle savedInstanceState) {
        super.onCreate(savedInstanceState);
        super.setContentView(R.layout.activity_main);
        initView();

        btnGallery.setOnClickListener(new View.OnClickListener() {
            @Override
            public void onClick(View view) {
                Intent i = new Intent(Intent.ACTION_PICK, MediaStore.Images.Media.EXTERNAL_CONTENT_URI);
                // start activity for result with request code
                startActivityForResult(i, 17);
            }
        });
    }

    @Override
    public void onActivityResult(int requestCode, int resultCode, Intent data) {
        super.onActivityResult(requestCode, resultCode, data);

        if (resultCode == Activity.RESULT_OK && requestCode == 17) {
            // get the data from the getData() method which is return the Uri of the selected image
            Uri uri = data.getData();
            String[] filePath = {MediaStore.Images.Media.DATA};
            // fetch the selected image path using content resolver
            // which is return the object of the cursor
            Cursor cursor = getContentResolver().query(uri, filePath, null, null, null);
            // this one mandatory for the developer to check cursor is null or not
            if (cursor != null) {
                // set the cursor at the first position or move cursor pointer at the beginning
                cursor.moveToFirst();
                int columnIndex = cursor.getColumnIndex(filePath[0]);
                String picturePath = cursor.getString(columnIndex);
                // this one also mandatory for the developer to close the open cursor
                cursor.close();

                BitmapFactory.Options options = new BitmapFactory.Options();
                options.inPreferredConfig = Bitmap.Config.ARGB_8888;
                // required bitmap into ARGB_8888 format
                Bitmap bitmap = BitmapFactory.decodeFile(picturePath, options);
                ivImage.setImageBitmap(bitmap);
            }
        }
    }

    private void initView() {
        btnGallery = (Button) findViewById(R.id.btnGallery);
        ivImage = (ImageView) findViewById(R.id.ivImage);
    }
}
Output :


Android activity as a dialog

Set Dialog theme into your manifest file. Like android:theme="@style/DialogTheme"
AndroidManifest.xml

<?xml version="1.0" encoding="utf-8"?>
<manifest xmlns:android="http://schemas.android.com/apk/res/android"
    package="com.androidsimplifycodes.example">

    <application
        android:allowBackup="true"
        android:icon="@mipmap/ic_launcher"
        android:label="@string/app_name"
        android:supportsRtl="true"
        android:theme="@style/AppTheme">
        <activity android:name=".MainActivity">
            <intent-filter>
                <action android:name="android.intent.action.MAIN" />

                <category android:name="android.intent.category.LAUNCHER" />
            </intent-filter>
        </activity>
        <activity
            android:name=".DialogActivity"
            android:theme="@style/DialogTheme" />
    </application>

</manifest>
Here, define DialogTheme theme added into your style file and set into manifest file. If you not want to use windows title then make true windowNoTitle attribute.
style.xml

<resources>

    <style name="AppTheme" parent="Theme.AppCompat.Light.DarkActionBar">
        <item name="colorPrimary">@color/colorPrimary</item>
        <item name="colorPrimaryDark">@color/colorPrimaryDark</item>
        <item name="colorAccent">@color/colorAccent</item>
    </style>

    <style name="DialogTheme" parent="Theme.AppCompat.Light.Dialog">
        <item name="android:textStyle">bold</item>
        <item name="android:gravity">center_vertical</item>
        <item name="colorPrimary">@color/colorPrimary</item>
        <item name="colorPrimaryDark">@color/colorPrimaryDark</item>
        <item name="colorAccent">@color/colorAccent</item>
        <item name="windowNoTitle">true</item>
    </style>

</resources>
activity_dialog.xml

<?xml version="1.0" encoding="utf-8"?>
<LinearLayout xmlns:android="http://schemas.android.com/apk/res/android"
    xmlns:tools="http://schemas.android.com/tools"
    android:layout_width="300dp"
    android:layout_height="match_parent"
    android:orientation="vertical"
    tools:context="com.androidsimplifycodes.example.MainActivity">

    <TextView
        android:layout_width="match_parent"
        android:layout_height="wrap_content"
        android:background="@android:color/black"
        android:gravity="center"
        android:padding="10dp"
        android:text="Set Title Of the Dialog"
        android:textAppearance="?android:textAppearanceMedium"
        android:textColor="@android:color/white"
        android:textStyle="bold" />

    <LinearLayout
        android:layout_width="match_parent"
        android:layout_height="250dp">

        <TextView
            android:layout_width="match_parent"
            android:layout_height="match_parent"
            android:gravity="center"
            android:text="Hello World!"
            android:textAppearance="?android:textAppearanceLarge"
            android:textColor="@android:color/holo_red_light" />

    </LinearLayout>

    <LinearLayout
        android:layout_width="match_parent"
        android:layout_height="wrap_content"
        android:background="@android:color/darker_gray"
        android:gravity="center"
        android:padding="5dp">

        <Button
            android:layout_width="wrap_content"
            android:layout_height="wrap_content"
            android:text="Ok" />

        <Button
            android:id="@+id/btnCancelDialog"
            android:layout_width="wrap_content"
            android:layout_height="wrap_content"
            android:text="Cancel" />

    </LinearLayout>

</LinearLayout>
DialogActivity.java

package com.androidsimplifycodes.example;

import android.os.Bundle;
import android.support.v7.app.AppCompatActivity;
import android.view.View;
import android.widget.Button;

public class DialogActivity extends AppCompatActivity {

    protected Button btnCancelDialog;

    @Override
    protected void onCreate(Bundle savedInstanceState) {
        super.onCreate(savedInstanceState);
        super.setContentView(R.layout.activity_dialog);
        initView();

        btnCancelDialog.setOnClickListener(new View.OnClickListener() {
            @Override
            public void onClick(View view) {
                finish();
            }
        });
    }

    private void initView() {
        btnCancelDialog = (Button) findViewById(R.id.btnCancelDialog);
    }
}
Output :

Monday, 27 February 2017

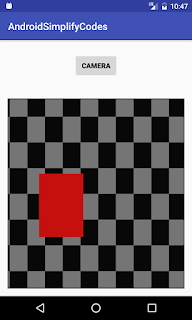
Android Capture Image Using Camera

    Add this three permission into your manifest file because we can stored captured image into app cache. but if you use android marshmallow then required run time permission.
AndroidManifest.xml

<?xml version="1.0" encoding="utf-8"?>
<manifest xmlns:android="http://schemas.android.com/apk/res/android"
    package="com.androidsimplifycodes.example">

    <uses-permission android:name="android.permission.CAMERA" />
    <uses-permission android:name="android.permission.WRITE_EXTERNAL_STORAGE" />
    <uses-permission android:name="android.permission.READ_EXTERNAL_STORAGE" />

    <application
        android:allowBackup="true"
        android:icon="@mipmap/ic_launcher"
        android:label="@string/app_name"
        android:supportsRtl="true"
        android:theme="@style/AppTheme">
        <activity android:name="com.androidsimplifycodes.example.MainActivity">
            <intent-filter>
                <action android:name="android.intent.action.MAIN" />

                <category android:name="android.intent.category.LAUNCHER" />
            </intent-filter>
        </activity>
    </application>

</manifest>
activity_main.xml

<?xml version="1.0" encoding="utf-8"?>
<LinearLayout xmlns:android="http://schemas.android.com/apk/res/android"
    xmlns:tools="http://schemas.android.com/tools"
    android:layout_width="match_parent"
    android:layout_height="match_parent"
    android:layout_weight="1"
    android:orientation="vertical"
    tools:context="com.androidsimplifycodes.example.MainActivity">

    <LinearLayout
        android:layout_width="match_parent"
        android:layout_height="0dp"
        android:layout_weight="0.2"
        android:gravity="center">

        <Button
            android:id="@+id/btnCamera"
            android:layout_width="wrap_content"
            android:layout_height="wrap_content"
            android:text="Camera"
            android:textColor="@android:color/black"
            android:textStyle="bold" />

    </LinearLayout>

    <RelativeLayout
        android:layout_width="match_parent"
        android:layout_height="0dp"
        android:layout_weight="0.8"
        android:gravity="center"
        android:padding="15dp">

        <ImageView
            android:id="@+id/ivImage"
            android:layout_width="match_parent"
            android:layout_height="match_parent"
            android:contentDescription="@null"
            android:scaleType="fitXY"/>

        <View
            android:layout_width="match_parent"
            android:layout_height="match_parent"
            android:background="@drawable/boarder" />

    </RelativeLayout>

</LinearLayout>
boarder.xml

<?xml version="1.0" encoding="UTF-8"?>
<shape xmlns:android="http://schemas.android.com/apk/res/android">
    <solid android:color="@android:color/transparent" />
    <stroke
        android:width="1.5dip"
        android:color="#000000" />
    <padding
        android:bottom="1dp"
        android:left="1dp"
        android:right="1dp"
        android:top="1dp" />
</shape>
MainActivity.java

package com.androidsimplifycodes.example;

import android.app.Activity;
import android.content.Intent;
import android.graphics.Bitmap;
import android.graphics.BitmapFactory;
import android.net.Uri;
import android.os.Bundle;
import android.provider.MediaStore;
import android.support.v7.app.AppCompatActivity;
import android.view.View;
import android.widget.Button;
import android.widget.ImageView;

import java.io.File;
import java.io.IOException;

public class MainActivity extends AppCompatActivity {

    protected Button btnCamera;
    protected ImageView ivImage;
    protected File tempFile = null;
    protected String imgPath;
    protected Uri uri;

    @Override
    protected void onCreate(Bundle savedInstanceState) {
        super.onCreate(savedInstanceState);
        super.setContentView(R.layout.activity_main);
        initView();

        btnCamera.setOnClickListener(new View.OnClickListener() {
            @Override
            public void onClick(View view) {
                try {
                    // create temp file into cache with .png extension.
                    tempFile = File.createTempFile("cameraImg", ".png", getExternalCacheDir());
                    // get temp file full path
                    imgPath = tempFile.getAbsolutePath();
                    // your file path should be required to converted into Uri format.
                    uri = Uri.fromFile(tempFile);
                } catch (IOException e) {
                    e.printStackTrace();
                }

                // image capture event set into Intent
                Intent intent = new Intent(MediaStore.ACTION_IMAGE_CAPTURE);
                // captured image stored at given uri
                intent.putExtra(MediaStore.EXTRA_OUTPUT, uri);
                // start activity for result with intent
                // and request code is 13(set according to your requirement)
                startActivityForResult(intent, 13);
            }
        });
    }

    private void initView() {
        btnCamera = (Button) findViewById(R.id.btnCamera);
        ivImage = (ImageView) findViewById(R.id.ivImage);
    }

    @Override
    public void onActivityResult(int requestCode, int resultCode, Intent data) {
        super.onActivityResult(requestCode, resultCode, data);
        if (resultCode == Activity.RESULT_OK && requestCode == 13) {
            BitmapFactory.Options options = new BitmapFactory.Options();
            options.inPreferredConfig = Bitmap.Config.ARGB_8888;
            // get captured image from the cache with preferred configuration is ARGB_8888
            Bitmap bitmap = BitmapFactory.decodeFile(imgPath, options);
            ivImage.setImageBitmap(bitmap);
        }
    }
}
Output :


Custom Toggle Button In Android

activity_main.xml

<?xml version="1.0" encoding="utf-8"?>
<LinearLayout xmlns:android="http://schemas.android.com/apk/res/android"
    xmlns:tools="http://schemas.android.com/tools"
    android:id="@+id/activity_main"
    android:layout_width="match_parent"
    android:layout_height="match_parent"
    android:layout_weight="1"
    android:orientation="vertical"
    tools:context="com.androidsimplifycodes.example.MainActivity">

    <LinearLayout
        android:layout_width="match_parent"
        android:layout_height="0dp"
        android:layout_weight="0.5"
        android:gravity="center"
        android:orientation="horizontal">

        <Button
            android:id="@+id/btnOne"
            android:layout_width="wrap_content"
            android:layout_height="wrap_content"
            android:background="@drawable/toggle_on"
            android:text="Button 1"
            android:textColor="@android:color/white"
            android:textStyle="bold" />

        <Button
            android:id="@+id/btnTwo"
            android:layout_width="wrap_content"
            android:layout_height="wrap_content"
            android:background="@drawable/toggle_off"
            android:text="Button 2"
            android:textColor="@android:color/white"
            android:textStyle="bold" />
    </LinearLayout>

    <LinearLayout
        android:layout_width="match_parent"
        android:layout_height="0dp"
        android:layout_weight="0.5"
        android:gravity="center">

        <TextView
            android:id="@+id/tvSelected"
            android:layout_width="wrap_content"
            android:layout_height="wrap_content"
            android:text="Button One Selected"
            android:textAppearance="?android:textAppearanceLarge"
            android:textColor="@color/colorPrimaryDark"
            android:textStyle="bold" />
    </LinearLayout>

</LinearLayout>
toggle_on.xml

<?xml version="1.0" encoding="utf-8"?>
<layer-list xmlns:android="http://schemas.android.com/apk/res/android">
    <item>
        <shape android:shape="rectangle">
            <stroke
                android:width="5dp"
                android:color="#3876BA" />
        </shape>
    </item>
    <item android:bottom="5dp">
        <shape android:shape="rectangle">
            <solid android:color="#3876BA" />
        </shape>
    </item>
</layer-list>
toggle_off.xml

<?xml version="1.0" encoding="utf-8"?>
<layer-list xmlns:android="http://schemas.android.com/apk/res/android">
    <item>
        <shape android:shape="rectangle">
            <stroke
                android:width="5dp"
                android:color="#4D4D4D" />
        </shape>
    </item>
    <item android:bottom="5dp">
        <shape android:shape="rectangle">
            <solid android:color="#4D4D4D" />
        </shape>
    </item>
</layer-list>
MainActivity.java

package com.androidsimplifycodes.example;

import android.os.Bundle;
import android.support.v7.app.AppCompatActivity;
import android.view.View;
import android.widget.Button;
import android.widget.TextView;

public class MainActivity extends AppCompatActivity {

    protected Button btnOne;
    protected Button btnTwo;
    protected TextView tvSelected;

    @Override
    protected void onCreate(Bundle savedInstanceState) {
        super.onCreate(savedInstanceState);
        super.setContentView(R.layout.activity_main);
        initView();

        btnOne.setOnClickListener(new View.OnClickListener() {
            @Override
            public void onClick(View view) {
                btnOne.setBackgroundResource(R.drawable.toggle_on);
                btnTwo.setBackgroundResource(R.drawable.toggle_off);
                tvSelected.setText("Button One Selected");
            }
        });

        btnTwo.setOnClickListener(new View.OnClickListener() {
            @Override
            public void onClick(View view) {
                btnOne.setBackgroundResource(R.drawable.toggle_off);
                btnTwo.setBackgroundResource(R.drawable.toggle_on);
                tvSelected.setText("Button Two Selected");
            }
        });
    }

    private void initView() {
        btnOne = (Button) findViewById(R.id.btnOne);
        btnTwo = (Button) findViewById(R.id.btnTwo);
        tvSelected = (TextView) findViewById(R.id.tvSelected);
    }
}
Output :


Sunday, 26 February 2017

How To Draw Rectangle In Android Canvas

    Create new Activity and remove R.layout.activity_main instead of set the our custom View class like DrawView into the setContentView() method and also pass the context of the activity into the DrawView constructor.
MainActivity.java

package com.androidsimplifycodes.canvas;

import android.support.v7.app.AppCompatActivity;
import android.os.Bundle;

public class MainActivity extends AppCompatActivity {

    @Override
    protected void onCreate(Bundle savedInstanceState) {
        super.onCreate(savedInstanceState);
        setContentView(new DrawView(this));
    }
}
    Create a new class DrawView extends View. Override the onDraw(Canvas canvas) method to draw rectangle on Canvas. Take the Paint class object for the drawing to the surface of the canvas here use setAntiAlias() function discuss later use of this function and setColor(int color) use for the set color of the rectangle or set color of the STROKE. setStrokeWidth(float width) use for the set boader width of the rectangle.
    If you want to make only bordered rectangle then use STROKE and if you want to use make fill rectangle then use FILL style according to the rectangle syntax we can draw rectangle using three type of methods.

public void drawRect(float left, float top, float right, float bottom, Paint paint);
 Passing float parameter into this function and at last passing the paint object for the drawing.

public void drawRect(Rect r, Paint paint);
 here, use Rect class is container for the store the integer parameter of the left, top, right, bottom of the rectangle.

public void drawRect(RectF rect, Paint paint);
 here, use RectF class is same as above class but store the float parameter of the left, top, right, bottom of the rectangle.
DrawView.java

package com.androidsimplifycodes.canvas;

import android.content.Context;
import android.graphics.Canvas;
import android.graphics.Color;
import android.graphics.Paint;
import android.graphics.Rect;
import android.graphics.RectF;
import android.view.View;

public class DrawView extends View {

    protected Paint paint;
    protected Rect rect;
    protected RectF rectF;

    public DrawView(Context context) {
        super(context);
        initView();
    }

    private void initView() {
        paint = new Paint();
        paint.setAntiAlias(true);
        paint.setStyle(Paint.Style.STROKE);
        paint.setStrokeWidth(6f);

        rect = new Rect(125, 125, 525, 525);
        rectF = new RectF(150.25f, 150.25f, 550.25f, 550.25f);
    }

    @Override
    protected void onDraw(Canvas canvas) {
        super.onDraw(canvas);

        paint.setColor(Color.RED);
        canvas.drawRect(100f, 100f, 500f, 500f, paint);

        paint.setColor(Color.GREEN);
        canvas.drawRect(rect, paint);

        paint.setColor(Color.BLUE);
        canvas.drawRect(rectF, paint);
    }
}
Output :

Saturday, 25 February 2017

How To Draw Circle In Android Canvas

    Create new Activity and remove R.layout.activity_main instead of set the our custom View class like DrawView into the setContentView() method and also pass the context of the activity into the DrawView constructor.
MainActivity.java

package com.androidsimplifycodes.canvas;

import android.support.v7.app.AppCompatActivity;
import android.os.Bundle;

public class MainActivity extends AppCompatActivity {

    @Override
    protected void onCreate(Bundle savedInstanceState) {
        super.onCreate(savedInstanceState);
        setContentView(new DrawView(this));
    }
}
    Create a new class DrawView extends View. Override the onDraw(Canvas canvas) method to draw circle on Canvas. Take the Paint class object for the drawing to the surface of the canvas here use setAntiAlias() function i can talk later use of this function and setColor(int color) use for the set color of the circle or set color of the STROKE. setStrokeWidth(float width) use for the set boader width of the circle.
    If you want to make only bordered circle then use STROKE and if you want to use make fill circle then use FILL style according to the circle syntax into canvas first two parameter represent the center paint X and Y and third one indicate radius of the circle at last pass the your paint object into the canvas circle.
DrawView.java

package com.androidsimplifycodes.canvas;

import android.content.Context;
import android.graphics.Canvas;
import android.graphics.Color;
import android.graphics.Paint;
import android.view.View;

public class DrawView extends View {

    protected Paint paint;

    public DrawView(Context context) {
        super(context);
        initView();
    }

    private void initView() {
        paint = new Paint();
        paint.setAntiAlias(true);
        paint.setColor(Color.GREEN);
        paint.setStrokeWidth(6f);
    }

    @Override
    protected void onDraw(Canvas canvas) {
        super.onDraw(canvas);

        paint.setStyle(Paint.Style.STROKE);
        canvas.drawCircle(getWidth() / 2, getHeight() / 4, 100, paint);

        paint.setStyle(Paint.Style.FILL);
        canvas.drawCircle(getWidth() / 2, getHeight() / 2, 100, paint);
    }
}
Output :